


Best viewed using:
Internet Explorer
or
Mozilla Firefox


Connecting the N8014 Constant Voltage Circuit
Wiring the N8104 is very straightforward. The two #32 black power input wires are connected to any voltage source (DC or DCC) with a maximum not exceeding 25-volts, or 14.5 volts AC. In the case of DC, polarity of the connections is unimportant.
Figure 1 below shows the correct connection for up to 3 LEDs wired to the board.
Note: LEDs are polarity sensitive devices and must be wired with their anodes (+), and cathodes (–) connected as shown.
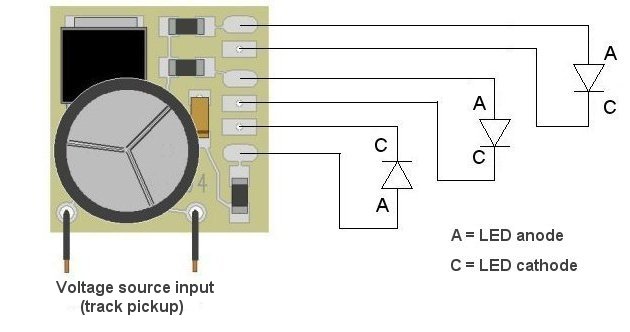
Figure 1
Caution! Carefully inspect all anode and cathode solder joints for solder bridges or shorted wires. Permanent damage to the circuit will occur if these outputs are shorted when power is applied.
External flicker control capacitor connection (N8104-2 and N8104-3
Figure 2 below shows the solder points on the board for wiring of an externally connected flicker control capacitor. The round pad is the + (positive DC) point and the square pad is the – (or ground) connection.

Figure 2
© 2015 Ngineering